How to Make a WordPress Site Private (or Members-Only)
Six ways to make a WordPress site private, from hiding one page to a members-only site, with what each method can and can't do.

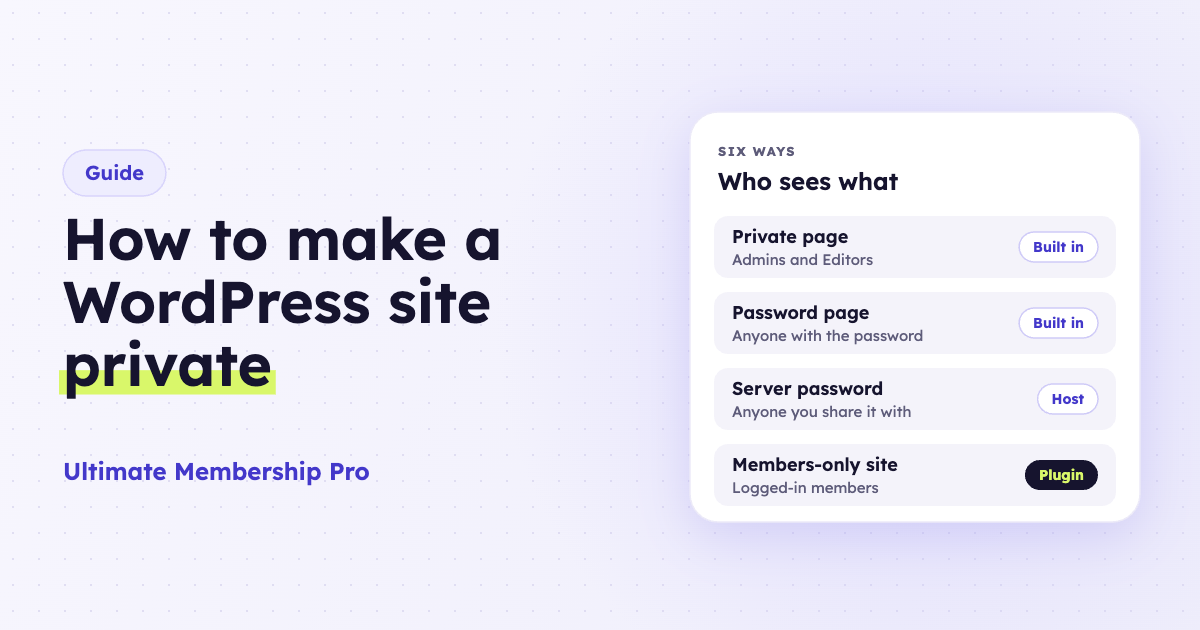
Self-hosted WordPress has no single switch that locks the whole site. You can make single pages Private or password-protected, hide the site while you build it, put a server password in front of it, or use a membership plugin so only logged-in members see your content. On WordPress.com, go to Settings → Reading → Site Visibility and choose Private.
This guide walks through each method, when it fits, and what it can’t do.
Which kind of private do you need?
“Private” means different things. Pick your goal first:
- Hide one page or post. Use the built-in Private or Password protected visibility.
- Hide the whole site while you build it. Use a coming soon page, a staging site, or a server password.
- Share the site with a small, fixed group. Use a server password, or a private site on WordPress.com.
- Run a members-only site. People sign up or get invited, log in, and see content based on their Membership. Use a membership plugin such as Ultimate Membership Pro.
Method 1: Set the whole site to Private on WordPress.com
If your site is hosted on WordPress.com, privacy is built in.
- Go to Settings → Reading in your dashboard.
- Scroll to Site Visibility.
- Choose Private and click Save Changes.
Your site is then visible only to you and the users you approve (WordPress.com guide). Visitors see a “Private Site” page and can log in to request access. You can also invite people with the Viewer role, which lets them read the site and comment, if comments are on.
Keep in mind:
- The Private option appears only after you launch the site.
- Everyone you add needs a WordPress.com account.
- Subscribers don’t get post emails while the site is private.
This setting is for WordPress.com only. A self-hosted WordPress site doesn’t have it.
Method 2: Make a single page or post Private
Every WordPress site can hide individual posts and pages.
- Open the page or post in the editor.
- In the settings sidebar, click the current Status.
- Choose Private and save.
A private page is visible only to Administrators and Editors. Everyone else gets nothing, even if they guess the URL (WordPress documentation). Visitors and other users won’t see private posts in your post lists. Administrators and Editors still see them, marked “Private:” before the title.
Good for: drafts you want to share with other editors, internal notes, a page you’re not ready to publish.
Limits: you can’t give access to Subscribers or customers. Only roles that can read private content see it, and by default those are Editors and Administrators. Editors can also change the page or make it public.
Method 3: Password-protect a page or post
Use this when you need to share one page with people who don’t have an account.
- Open the page or post.
- Click the current Status.
- Choose Password protected, type a password, and save.
Visitors see the title, marked “Protected:”, plus a password form. The content and excerpt stay hidden until they enter the password (WordPress documentation).
Good for: a client preview, a page for one event, a single download page.
Limits:
- One password per page, shared by everyone. You can’t tell who opened it or remove one person’s access.
- The browser remembers only one post password at a time.
- Protected posts can still appear on your blog and archive pages.
Method 4: Hide the site while you build it
- On WordPress.com, the Coming Soon setting (also in Settings → Reading) hides the site while you work on it. You can still share a preview link.
- On self-hosted WordPress, a coming soon or maintenance mode plugin shows visitors a placeholder page while you see the real site.
This works for launch day. It isn’t meant for a site that stays private for good.
“Discourage search engines” doesn’t make your site private
In Settings → Reading, the Discourage search engines from indexing this site box only asks search engines not to index your site. WordPress adds a noindex, nofollow robots tag, and each search engine decides whether to honor it. Anyone with the link can still open every page (WordPress documentation). Use it alongside another method, never on its own.
Method 5: Put a server password on the whole site
You can put a password in front of the whole site on the server. A login box appears before WordPress loads. On Apache servers, this is HTTP basic authentication with an .htpasswd file. Some hosts offer it in the hosting control panel.
Good for: a staging site, a small team, a site nobody outside your group should reach.
Limits:
- It’s separate from WordPress users. People may log in twice: once at the server prompt and again in WordPress.
- There’s no sign-up, no approval, and no different access for different people.
- Test your forms afterward. A server lock can block features that call your site.
If you’re not comfortable editing server files, ask your host.
Method 6: Make a members-only WordPress site with Ultimate Membership Pro
A members-only site is private in a more flexible way. Visitors can see a public homepage and sign-up page. Members log in and see what their Membership gives them. You decide who joins and what each person sees. Here’s how to set it up with Ultimate Membership Pro.
Step 1: Set the default pages
Ultimate Membership Pro needs a few pages to work: Register, Login, Account, Logout, Subscription Plan, Lost Password and a Default Redirect page. Add each page’s shortcode with the MP Shortcodes button, then pick its type in the Membership Pro – Page Type box. You can change these pages later in General Options.
The Default Redirect page is where visitors are sent when a lock redirects them and doesn’t name its own page. Make it your login or sign-up page.
Step 2: Create your Memberships
Create at least one Membership in the Ultimate Membership Pro dashboard. Each one can be free or paid. A private team site can use one free Membership. A paid community can have several.
Step 3: Lock the whole site or the sections you choose
You have three ways to lock content:
- Lock groups of content with Lock Rules. Go to Lock Rules in the Ultimate Membership Pro dashboard and add a rule. A rule can cover all posts of a type, all posts in a category, files by URL, a specific URL, or every URL that contains a keyword. Set it to Block Only or Show Only for the users you pick, such as Unregistered visitors or chosen Memberships.
- Lock a single page or post. Edit it and find the Ultimate Membership Pro – Locker box. Choose Show Page Only or Block Page Only for the Memberships or user types you want. Then pick what blocked visitors get: a redirect to a page, or replacement content you write in the editor.
- Lock the whole site. Ultimate Membership Pro also has an option to restrict the entire website for visitors who aren’t logged in. If you turn it on, log out afterward and check that your login and sign-up pages still open.
Use Lock Rules if you want a public homepage and a private members area. Lock the posts, categories or URLs that hold member content, and leave the homepage, sign-up page and login page open.
Step 4: Decide who can sign up
A private site often shouldn’t take open sign-ups. Ultimate Membership Pro gives you two registration controls in every plan:
- Manual approval. In your register form settings, set the default WordPress role for new users to Pending. Pending users can’t log in until you approve them. To approve someone, go to Users in the Ultimate Membership Pro dashboard and click Approve under their username. If you gave a Membership its own WordPress role, that role overrides the default, so check those too.
- Invitation codes. Only people with a valid code can register. Create codes with Add Single Invitation Code or Add Bulk Invitation Code, and use Repeat to set how many times each code works. Then enable the invitation code field under Register Form → Custom Fields.
You can also turn on Double Email Verification, so new members confirm their email before they can log in.
Step 5: Keep members out of wp-admin and tidy the menus
Ultimate Membership Pro blocks the WordPress dashboard for everyone except admins by default. Members stay on the front end of your site. If a role needs dashboard access, allow it under General Options → Access.
Next, hide links that members-only visitors shouldn’t see. Go to General Options → Menus, pick your menu, and set each link to show or block for chosen Memberships or user status.
Step 6: Test as a visitor
Admins see everything, so a locked page will look open while you’re logged in. Log out, or open a private browser window, and visit your pages. For a full check, create a test user with a lower Membership and log in as that user.
More controls for members-only sites
These come with every plan:
- Login Redirects+ sends each Membership to its own page after login.
- Cheat Off allows one active login per account. A new login ends the earlier session, which stops two people from using one account at the same time.
- Security Login blocks an IP address after too many failed login attempts.
These come with the Full Package and Agency plans:
- Hidden WP Login sends visitors who open wp-login.php to your own login page. Your own IP addresses can still use the WordPress login.
- Restrict WP Menu shows a different WordPress menu for each Membership.
- Restrict Widgets shows or hides each widget for guests, logged-in users or chosen Memberships.
- Redirect Back returns members to the page they were trying to open after they log in.
- Granted Access lets visitors from IP addresses you choose skip content restrictions, such as an office network.
Compare the methods
| Method | Who can see the site | Good for | Limits |
|---|---|---|---|
| WordPress.com Private | You and users you approve | Private blogs and team sites on WordPress.com | WordPress.com only; every user needs a WordPress.com account |
| Private page or post | Administrators and Editors | Internal pages, drafts to share with editors | Can’t give access to members or customers |
| Password-protected page | Anyone with the password | Client previews, one-off pages | One shared password per page; no per-person access |
| Coming soon / maintenance page | You, while logged in | Building the site before launch | Not built for long-term privacy |
| “Discourage search engines” | Everyone | Keeping a staging site out of search results | Only a request; doesn’t block visitors |
| Server password | Anyone with the server login | Staging sites, small fixed teams | Separate from WordPress users; no sign-up or approval |
| Ultimate Membership Pro | Logged-in members, by Membership | Members-only sites, communities, paid content | Needs a plugin and some setup |
Don’t forget your files
Locking a page isn’t the same as locking the files on it. PDFs, videos and images in your Media Library have their own URLs. If you share files with members, protect them too. In Ultimate Membership Pro, add a Lock Rule for Files by URL so only the Memberships you choose can open them.
FAQ
Can I make a WordPress site private without a plugin?
Partly. You can make single pages Private or password-protected, and check “Discourage search engines.” None of these lock the whole site. On WordPress.com, the Private site setting does. On self-hosted WordPress, use a server password or a plugin.
Who can see a private page in WordPress?
By default, only Administrators and Editors. Visitors and Subscribers can’t see it, even if they have the URL. To share a page with members or customers, use a password or a membership plugin instead.
Does “Discourage search engines” hide my site?
No. It adds a noindex tag that asks search engines not to index your site. Anyone with the link can still visit every page. Pair it with a real lock, such as a server password or members-only access.
How do I password protect my entire WordPress site?
WordPress passwords work one page at a time. To protect the whole site, use HTTP basic authentication on your server. Some hosts offer it in the control panel. For separate logins per person, use a membership plugin like Ultimate Membership Pro.
Can my homepage stay public while the rest is members-only?
Yes. In Ultimate Membership Pro, lock only the member content with Lock Rules or the Locker box. Leave your homepage, sign-up page and login page open. Visitors see what you offer, and members log in to see the rest.
Make your site members-only
If you need more than a hidden page, a members-only site gives you control over who joins and what each person sees. See how content restriction works in Ultimate Membership Pro, or compare plans and pricing.